Unity Tip : EventBus(이벤트버스)
게임 개발에서 이벤트 버스 패턴은 중요한 개념 중 하나입니다. 이 패턴은 게임 오브젝트 간의 통신과 상호작용을 더 간단하게 만들고, 코드의 모듈화 및 유지 보수를 향상할 수 있습니다. Unity에서 이벤트 버스 패턴을 사용하여 게임 개발을 어떻게 더 효율적으로 할 수 있는지 알아보겠습니다.
참고 자료 링크 :
https://www.yes24.com/Product/Goods/114854688
유니티로 배우는 게임 디자인 패턴 - 예스24
우아하게 게임을 개발하고 싶다면 디자인 패턴을 배우자 이 책은 유니티의 고급 프로그래밍 기술과 디자인 패턴으로 작업을 시작할 준비가 된 모든 게임 개발자를 위해 쓰였다. 소프트웨어 디
www.yes24.com
EventBus
이벤트버스란?
이벤트 버스는 소프트웨어 아키텍처 패턴 중 하나로, 다른 컴포넌트나 모듈 간의 통신을 관리하기 위해 사용됩니다. 이 패턴은 이벤트를 발행(emit)하고, 해당 이벤트를 구독(subscribe)하는 리스너에게 전달함으로써 컴포넌트 간의 결합도를 낮추고, 코드의 모듈화를 촉진합니다.
이벤트 버스 패턴의 장점
- 느슨한 결합: 컴포넌트 간의 강한 의존성을 피하고 느슨한 결합을 유지할 수 있습니다.
- 모듈화: 코드를 모듈화 하여 개발 및 유지 보수를 더 쉽게 할 수 있습니다.
- 확장성: 새로운 이벤트 및 리스너를 추가하기 쉽습니다.
주의사항과 고려 사항
- 과용하지 않기: 모든 것을 이벤트로 처리하는 것은 오히려 복잡성을 높일 수 있습니다.
- 성능 고려: 이벤트 처리가 빈번한 경우 성능 문제를 고려해야 합니다.
Unity에서 이벤트 버스 구현하기
Step 1 : 이벤트 클래스 구현하기
먼저, 게임에서 발생할 수 있는 각각의 이벤트를 나타내는 이벤트 클래스를 정의합니다. 이 클래스는 이벤트의 데이터 및 관련 정보를 포함합니다. 이 예제에서는 GameEventType 열거형과 GameStatesEvent 구조체를 사용한 것처럼 각 이벤트 유형과 관련된 정보를 포함하는 클래스를 정의합니다.
// 게임 이벤트 종류를 정의하는 열거형
public enum GameEventType
{
    COUNTDOWN,  // 카운트 다운 이벤트
    START,      // 시작 이벤트
    RESTART,    // 재시작 이벤트
    PAUSE,      // 일시 정지 이벤트
    STOP,       // 중지 이벤트
    FINISH,     // 완료 이벤트
    QUIT,       // 종료 이벤트
}

// 게임 상태 이벤트를 나타내는 구조체
public struct GameStatesEvent
{
    public GameEventType gameEventType;  // 게임 이벤트 타입을 저장하는 변수

    // GameStatesEvent 구조체의 생성자
    public GameStatesEvent(GameEventType gameEventType)
    {
        this.gameEventType = gameEventType;  // 생성자를 통해 게임 이벤트 타입을 초기화합니다.
    }

    // GameStatesEvent 구조체의 인스턴스를 트리거(발생)하는 정적 메서드
    static GameStatesEvent e;

    public static void Trigger(GameEventType gameEventType)
    {
        e.gameEventType = gameEventType;  // gameEventType 변수에 전달된 이벤트 타입을 저장합니다.
        GameEventManager.TriggerEvent<GameStatesEvent>(e);  // GameEventManager 클래스를 사용하여 이벤트를 트리거합니다.
    }
}
Step 2 : 이벤트 리스너 인터페이스 구현하기
이제 이벤트를 수신하고 처리할 수 있는 리스너 인터페이스를 정의합니다. 예를 들어, 다음과 같이 EventListener 인터페이스를 만들 수 있습니다.
// 이벤트 리스너 베이스 인터페이스
public interface EventListenerBase { }

// 이벤트 리스너 인터페이스
public interface EventListener<T> : EventListenerBase
{
    void OnEvent(T eventType);
}
Step 3 : 이벤트 버스 관리 클래스(GameEventManger) 구현하기
이벤트를 관리하고 통신을 중계할 이벤트 버스 관리 클래스를 만듭니다. 이 클래스는 이벤트를 발행하고 구독하는 메서드를 포함합니다. 또한, 이벤트를 수신한 리스너에게 전달하는 로직을 구현합니다.
// 게임 이벤트 관리자 클래스
public class GameEventManager
{
    // 이벤트 타입별로 구독자(리스너) 목록을 관리하는 사전
    private static readonly Dictionary<Type, List<EventListenerBase>> _subscribersList
        = new Dictionary<Type, List<EventListenerBase>>();

    // 이벤트를 구독하는 메서드
    public static void Subscribe<GameEvents>(EventListener<GameEvents> listener) where GameEvents : struct
    {
        Type eventType = typeof(GameEvents);

        if (!_subscribersList.ContainsKey(eventType))
        {
            _subscribersList[eventType] = new List<EventListenerBase>();
        }

        if (!SubscriptionExists(eventType, listener))
        {
            _subscribersList[eventType].Add(listener);
        }
    }

    // 이벤트 구독 취소 메서드
    public static void Unsubscribe<GameEvents>(EventListener<GameEvents> listener) where GameEvents : struct
    {
        Type eventType = typeof(GameEvents);

        if (!_subscribersList.ContainsKey(eventType))
            return;

        List<EventListenerBase> subscriberList = _subscribersList[eventType];

        for (int i = subscriberList.Count - 1; i >= 0; i--)
        {
            if (subscriberList[i] == listener)
            {
                subscriberList.Remove(subscriberList[i]);

                if (subscriberList.Count == 0)
                {
                    _subscribersList.Remove(eventType);
                }
                return;
            }
        }
    }

    // 이미 구독 중인지 확인하는 메서드
    private static bool SubscriptionExists(Type type, EventListenerBase receiver)
    {
        List<EventListenerBase> receivers;
        if (!_subscribersList.TryGetValue(type, out receivers)) return false;

        bool exists = false;
        for (int i = receivers.Count - 1; i >= 0; i--)
        {
            if (receivers[i] == receiver)
            {
                exists = true;
                break;
            }
        }
        return exists;
    }

    // 이벤트를 발생시키는 메서드
    public static void TriggerEvent<GameEvents>(GameEvents events) where GameEvents : struct
    {
        Type eventType = typeof(GameEvents);
        List<EventListenerBase> list;
        if (!_subscribersList.TryGetValue(eventType, out list))
        {
            return;
        }

        for (int i = list.Count - 1; i >= 0; i--)
        {
            (list[i] as EventListener<GameEvents>).OnEvent(events);
        }
    }
}

// 이벤트 리스너를 등록 및 해제하는 확장 메서드
public static class GameEventsRegister
{
    public delegate void Delegate<T>(T eventType);

    // 이벤트 리스너를 등록하는 확장 메서드
    public static void EventStartingListening<EventType>(this EventListener<EventType> caller) where EventType : struct
    {
        GameEventManager.Subscribe<EventType>(caller);
    }

    // 이벤트 리스너를 해제하는 확장 메서드
    public static void EventStopListening<EventType>(this EventListener<EventType> caller) where EventType : struct
    {
        GameEventManager.Unsubscribe<EventType>(caller);
    }
}
Step 4 : 이벤트 발행 및 구독
이제 게임 오브젝트에서 필요한 이벤트를 구독하고, 이벤트를 발생시킬 때 해당 이벤트를 트리거합니다.
PlayerController.cs
이 코드는 Unity 게임에서 상태 변화를 처리하기 위한 스크립트입니다. 아래는 코드의 주요 기능과 설명입니다:
using UnityEngine;

public class PlayerController : MonoBehaviour, EventListener<GameStatesEvent>
{
    private string _status;

    private void OnEnable()
    {
        // GameStatesEvent 이벤트를 구독합니다.
        this.EventStartingListening<GameStatesEvent>();
    }

    private void OnDisable()
    {
        // 스크립트 비활성화 시 이벤트 구독을 해제합니다.
        this.EventStopListening<GameStatesEvent>();
    }

    private void GameStart()
    {
        // 게임 시작 시 상태를 업데이트합니다.
        _status = "게임 시작됨";
    }

    private void GameStopped()
    {
        // 게임 정지 시 상태를 업데이트합니다.
        _status = "게임 정지됨";
    }

    private void OnGUI()
    {
        // GUI에 게임 상태를 표시합니다.
        GUI.color = Color.green;
        GUI.Label(new Rect(10, 60, 200, 20), "게임 상태: " + _status);
    }

    public void OnEvent(GameStatesEvent eventType)
    {
        // GameStatesEvent 이벤트가 발생하면 처리하는 메서드입니다.
        switch (eventType.gameEventType)
        {
            case GameEventType.START:
                GameStart();
                break;
            case GameEventType.STOP:
                GameStopped();
                break;
        }
    }
}- OnEnable 메서드: 스크립트가 활성화될 때 호출되며, GameStatesEvent 이벤트를 구독합니다. 이렇게 하면 이벤트가 발생할 때 해당 이벤트 핸들러가 호출됩니다.
- OnDisable 메서드: 스크립트가 비활성화될 때 호출되며, 이벤트 구독을 해제합니다. 스크립트가 비활성화되면 더 이상 이벤트를 수신하지 않습니다.
- GameStart 메서드: 게임 시작 상태를 처리하는 메서드로, 상태를 업데이트하여 _status 변수에 "게임 시작됨"을 할당합니다.
- GameStopped 메서드: 게임 정지 상태를 처리하는 메서드로, 상태를 업데이트하여 _status 변수에 "게임 정지됨"을 할당합니다.
- OnGUI 메서드: GUI에 게임 상태를 표시하는 메서드로, _status 변수에 저장된 상태를 녹색으로 표시합니다.
- OnEvent 메서드: GameStatesEvent 이벤트를 처리하는 메서드입니다. 이벤트 타입에 따라 GameStart 또는 GameStopped 메서드를 호출하여 게임 상태를 업데이트합니다.
HUDController.cs
이 코드는 Unity 게임에서 HUD (Head-Up Display)를 관리하는 스크립트를 나타냅니다. 코드의 주요 기능과 설명은 다음과 같습니다:
using UnityEngine;

public class HUDController : MonoBehaviour, EventListener<GameStatesEvent>
{
    private bool _isDisplayOn; // HUD 표시 여부를 나타내는 변수

    private void OnEnable()
    {
        // 이 스크립트가 활성화될 때 GameStatesEvent 이벤트를 구독합니다.
        this.EventStartingListening<GameStatesEvent>();
    }

    private void OnDisable()
    {
        // 이 스크립트가 비활성화될 때 이벤트 구독을 해제합니다.
        this.EventStopListening<GameStatesEvent>();
    }

    private void DisplayHUD()
    {
        // HUD를 표시하는 메서드로, _isDisplayOn을 true로 설정합니다.
        _isDisplayOn = true;
    }

    private void OnGUI()
    {
        if (_isDisplayOn)
        {
            // HUD가 표시 중일 때
            if (GUILayout.Button("게임 정지"))
            {
                // "게임 정지" 버튼을 누르면 HUD를 숨기고 게임 정지 이벤트를 트리거합니다.
                _isDisplayOn = false;
                GameEventManager.TriggerEvent(new GameStatesEvent
                {
                    gameEventType = GameEventType.STOP
                });
            }
        }
    }

    public void OnEvent(GameStatesEvent eventType)
    {
        // GameStatesEvent 이벤트를 처리하는 메서드입니다.
        switch (eventType.gameEventType)
        {
            case GameEventType.START:
                // 게임 시작 이벤트를 받으면 HUD를 표시합니다.
                DisplayHUD();
                break;
        }
    }
}- OnEnable 메서드: 스크립트가 활성화될 때 호출되며, GameStatesEvent 이벤트를 구독합니다. 이렇게 하면 이벤트가 발생할 때 해당 이벤트 핸들러가 호출됩니다.
- OnDisable 메서드: 스크립트가 비활성화될 때 호출되며, 이벤트 구독을 해제합니다. 스크립트가 비활성화되면 더 이상 이벤트를 수신하지 않습니다.
- DisplayHUD 메서드: HUD를 표시하는 메서드로, _isDisplayOn 변수를 true로 설정하여 HUD가 표시됨을 나타냅니다.
- OnGUI 메서드: GUI를 그리는 메서드로, HUD가 표시 중일 때 "게임 정지" 버튼을 표시하고 클릭하면 HUD를 숨기고 게임 정지 이벤트를 트리거합니다.
- OnEvent 메서드: GameStatesEvent 이벤트를 처리하는 메서드입니다. 이벤트 타입에 따라 게임이 시작되면 HUD를 표시합니다.
이 코드를 사용하면 게임 시작 시 HUD를 표시하고 "게임 정지" 버튼을 클릭하여 HUD를 숨길 수 있으며, 게임 정지 이벤트를 트리거하여 게임 상태를 제어할 수 있습니다.
CountDownTimer.cs
이 코드는 Unity 게임에서 카운트다운을 관리하는 스크립트를 나타냅니다. 코드의 주요 기능과 설명은 다음과 같습니다:
using UnityEngine;

public class CountDownTimer : MonoBehaviour, EventListener<GameStatesEvent>
{
    private float _currentTime; // 현재 카운트다운 시간을 나타내는 변수
    private float _duration = 3.0f; // 카운트다운 기간을 설정하는 변수

    private void OnEnable()
    {
        // 이 스크립트가 활성화될 때 GameStatesEvent 이벤트를 구독합니다.
        this.EventStartingListening<GameStatesEvent>();
    }

    private void OnDisable()
    {
        // 이 스크립트가 비활성화될 때 이벤트 구독을 해제합니다.
        this.EventStopListening<GameStatesEvent>();
    }

    private void StartTimer()
    {
        // 카운트다운을 시작하는 메서드입니다.
        StartCoroutine(CountDown());
    }

    private IEnumerator CountDown()
    {
        _currentTime = _duration;

        while (_currentTime > 0)
        {
            yield return new WaitForSeconds(1.0f);
            _currentTime--;
        }

        // 카운트다운이 끝나면 게임 시작 이벤트를 트리거합니다.
        GameEventManager.TriggerEvent(new GameStatesEvent
        {
            gameEventType = GameEventType.START
        });
    }

    public void OnEvent(GameStatesEvent eventType)
    {
        // GameStatesEvent 이벤트를 처리하는 메서드입니다.
        switch (eventType.gameEventType)
        {
            case GameEventType.COUNTDOWN:
                // COUNTDOWN 이벤트를 받으면 카운트다운을 시작합니다.
                StartTimer();
                break;
        }
    }

    private void OnGUI()
    {
        // GUI에 현재 카운트다운 시간을 표시합니다.
        GUI.color = Color.blue;
        GUI.Label(new Rect(125, 0, 100, 20), "남은 시간: " + _currentTime);
    }
}- OnEnable 메서드: 스크립트가 활성화될 때 호출되며, GameStatesEvent 이벤트를 구독합니다. 이렇게 하면 이벤트가 발생할 때 해당 이벤트 핸들러가 호출됩니다.
- OnDisable 메서드: 스크립트가 비활성화될 때 호출되며, 이벤트 구독을 해제합니다. 스크립트가 비활성화되면 더 이상 이벤트를 수신하지 않습니다.
- StartTimer 메서드: 카운트다운을 시작하는 메서드로, CountDown 코루틴을 시작합니다.
- CountDown 코루틴: 지정된 기간 동안 카운트다운을 진행하고, 시간이 끝나면 게임 시작 이벤트를 트리거합니다.
- OnEvent 메서드: GameStatesEvent 이벤트를 처리하는 메서드입니다. 이벤트 타입에 따라 COUNTDOWN 이벤트를 받으면 카운트다운을 시작합니다.
- OnGUI 메서드: GUI를 그리는 메서드로, 현재 카운트다운 시간을 표시합니다.
이 코드를 사용하면 COUNTDOWN 이벤트를 트리거하여 카운트다운을 시작하고, 화면에 남은 시간을 표시할 수 있습니다. 카운트다운이 끝나면 게임 시작 이벤트를 트리거하여 게임을 시작할 수 있습니다.
ClientEventBus.cs
이 코드는 Unity 게임에서 클라이언트 이벤트 버스를 관리하는 스크립트를 나타냅니다. 코드의 주요 기능과 설명은 다음과 같습니다:
using UnityEngine;

public class ClientEventBus : MonoBehaviour, EventListener<GameStatesEvent>
{
    private bool _isButtonEnabled; // 버튼 활성화 여부를 나타내는 변수

    private void Start()
    {
        // HUDController, CountDownTimer, PlayerController 스크립트를 게임 오브젝트에 추가합니다.
        gameObject.AddComponent<HUDController>();
        gameObject.AddComponent<CountDownTimer>();
        gameObject.AddComponent<PlayerController>();

        _isButtonEnabled = true; // 버튼을 활성화 상태로 초기화합니다.
    }

    private void OnEnable()
    {
        // 이 스크립트가 활성화될 때 GameStatesEvent 이벤트를 구독합니다.
        this.EventStartingListening<GameStatesEvent>();
    }

    private void OnDisable()
    {
        // 이 스크립트가 비활성화될 때 이벤트 구독을 해제합니다.
        this.EventStopListening<GameStatesEvent>();
    }

    private void ReStart()
    {
        // 재시작 메서드로, 버튼을 다시 활성화 상태로 설정합니다.
        _isButtonEnabled = true;
    }

    private void OnGUI()
    {
        if (_isButtonEnabled)
        {
            // 버튼이 활성화된 상태일 때
            if (GUILayout.Button("카운트다운 시작"))
            {
                _isButtonEnabled = false; // 버튼을 비활성화 상태로 변경합니다.
                GameEventManager.TriggerEvent(new GameStatesEvent
                {
                    gameEventType = GameEventType.COUNTDOWN
                }); // COUNTDOWN 이벤트를 트리거합니다.
            }
        }
    }

    public void OnEvent(GameStatesEvent eventType)
    {
        // GameStatesEvent 이벤트를 처리하는 메서드입니다.
        switch (eventType.gameEventType)
        {
            case GameEventType.STOP:
                // STOP 이벤트를 받으면 ReStart 메서드를 호출하여 버튼을 다시 활성화 상태로 변경합니다.
                ReStart();
                break;
        }
    }
}- Start 메서드: 게임 시작 시 실행되며, HUDController, CountDownTimer 및 PlayerController 스크립트를 게임 오브젝트에 추가합니다. 또한 _isButtonEnabled 변수를 true로 초기화하여 버튼을 활성화 상태로 설정합니다.
- OnEnable 메서드: 스크립트가 활성화될 때 호출되며, GameStatesEvent 이벤트를 구독합니다.
- OnDisable 메서드: 스크립트가 비활성화될 때 호출되며, 이벤트 구독을 해제합니다.
- ReStart 메서드: 게임을 재시작하는 메서드로, 버튼을 다시 활성화 상태로 설정합니다.
- OnGUI 메서드: GUI를 그리는 메서드로, _isButtonEnabled 변수가 true인 경우 "카운트다운 시작" 버튼을 표시하고 클릭하면 COUNTDOWN 이벤트를 트리거하여 게임 카운트다운을 시작합니다.
- OnEvent 메서드: GameStatesEvent 이벤트를 처리하는 메서드입니다. STOP 이벤트를 받으면 ReStart 메서드를 호출하여 버튼을 다시 활성화 상태로 변경합니다.
이 코드를 사용하면 게임 시작 시 버튼을 클릭하여 게임 카운트다운을 시작하고, 게임이 정지되면 버튼을 다시 활성화할 수 있습니다. STOP 이벤트를 통해 버튼 상태를 관리하여 게임을 제어할 수 있습니다.
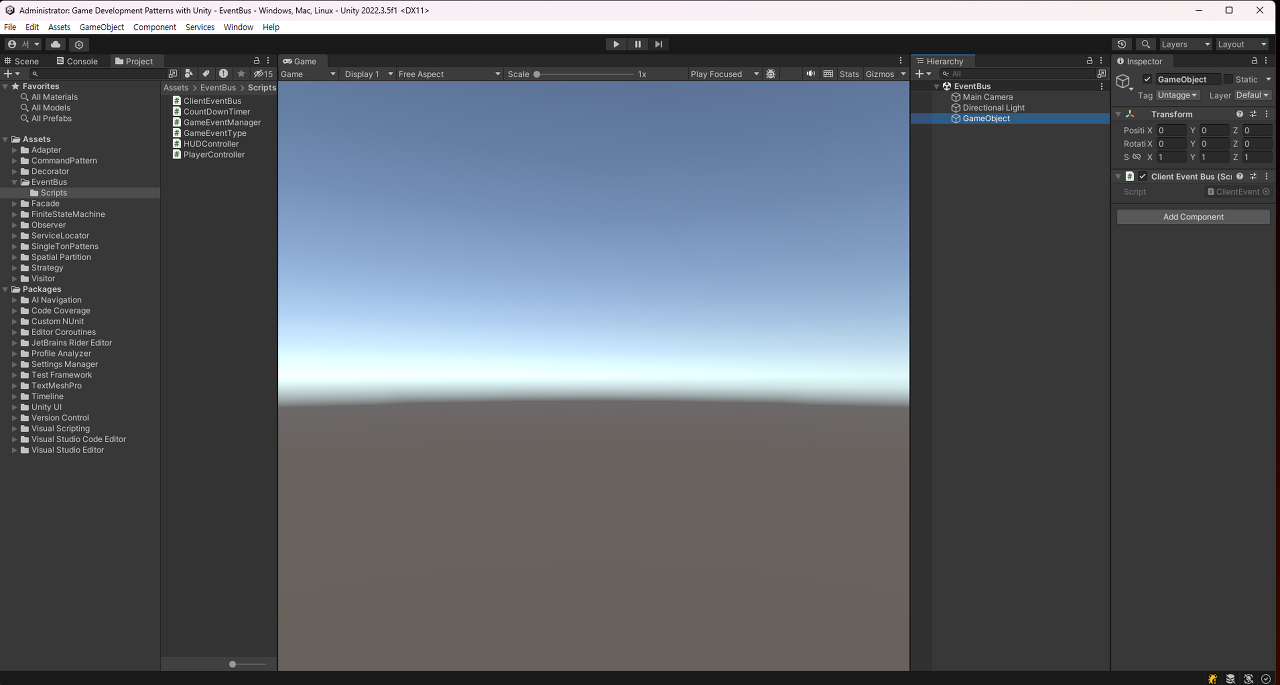
Step 5 : 씬 구성 및 결과 확인하기
이제 빈 씬을 만들고 새로운 GameObject를 생성하고 ClientEventBus 컴포넌트를 추가합니다.
실행결과 :
마무리
이벤트 버스 패턴은 Unity 게임 개발에서 강력한 도구 중 하나로, 게임의 모듈화와 유지 보수성을 향상할 수 있습니다. 적절하게 사용하면 코드의 가독성을 향상하고 다양한 컴포넌트 간의 효율적인 통신을 도울 수 있습니다. 이 패턴을 적용하여 더욱 효율적인 Unity 게임을 개발할 수 있습니다.